#27: Your First ESP32 ULP Program
Getting Setup
This repo takes a Docker-first approach and assumes you are on Linux. It can definitely work on Windows but container development is pretty cumbersome there. If you are on Windows just install ESP-IDF locally. You’ll have to figure out how to modify certain steps that deal with connecting over serial, building, and flashing.
- Clone the repository
git checkout lesson-1- Open the repo in VSCode
- Plug in your dev board
- Run
ls /dev/tty*to see what your dev board enumerates as (i.e /dev/ttyUSB0) - Modify the .devcontainer.json file in the project. In the
runArgssection uncomment the line that adds a device to the container and modify the line to be the device path from Step 5 - Reopen the project in a Dev Container. This will incur a one time hit while the image is built and the container is launched. This can take about 5-10 minutes depending on your internet speed.
- Open a terminal in VSCode (you should be inside a dev container at this point)
- Run
idf.py --versionto confirm the IDF environment is properly configured - Run
idf.py buildto build the project. - Run
idf.py flash monitor
The project will build and flash to your dev board with output like this:
1
2
3
4
5
6
7
8
...
I (246) main_task: Started on CPU0
I (286) main_task: Calling app_main()
I (286) main: ESP32-S3 ULP Playground
I (286) main: Main loop
I (5286) main: Main loop
I (10286) main: Main loop
...
Congratulations! You’re all set up!
All work for subsequent lessons will be done from within the Dev Container in VSCode.
Any time you start the container in VSCode it will look for your device. If it’s unplugged the container will fail to launch. Either comment out the line in devcontainer.json or momentarily plug in your device so the Dev Container can launch. It does NOT have to be constantly plugged in while editing code in the Dev Container or doing builds. Just at container launch time.
Lesson 2 - Your First ULP Program
What We’ll Cover
- Write your first ULP program in C
- Configure your project to be able to run your ULP application
- Modify the main application to launch your ULP application
To see all of the changes made and working simply run git checkout lesson-2-end.
To follow along, run git checkout lesson-2 and follow the instructions below.
Since our ULP program is essentially an entirely different application running on a different processor, we will segregate it from the rest of our code. To keep things simple we will do that as a sub folder under the main folder but, as we’ll see in later lessons, you can put the ULP code pretty much anywhere you want.
Create a folder named ulp under the main folder.
You don’t have to name the folder ulp. We’re just using that as a simple indication of what the folder contains.
Under the ulp folder create a file called main.c.
Remember, there are two ULP co-processors available on the ESP32. One is the Finite State Machine or FSM ULP and the other is the RISC-V ULP. We are using the RISC-V ULP in all of these lessons as it allows us to write code in C.
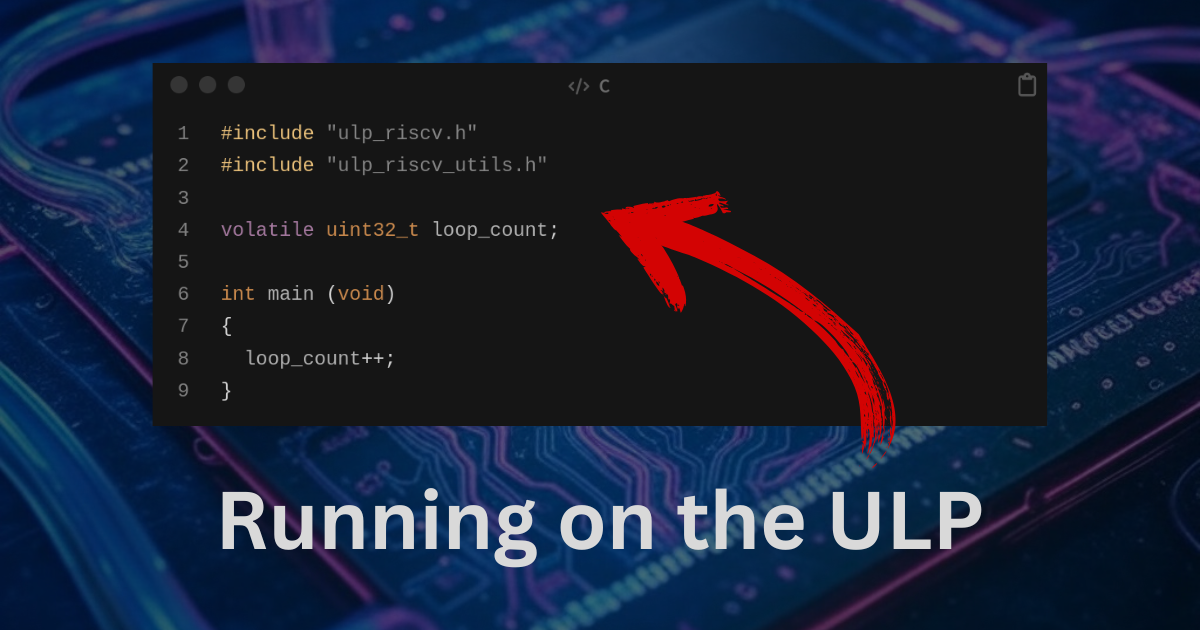
Add the following code to main.c
1
2
3
4
5
6
7
8
9
#include "ulp_riscv.h"
#include "ulp_riscv_utils.h"

volatile uint32_t loop_count;

int main (void)
{
  loop_count++;
}
That’s it. It doesn’t get much simpler than that.
volatile uint32_t loop_count;
Here we’ve declared a shared variable which will be accessible from our main application and which will maintain it’s state even while the ESP32 is in deep sleep.
In our main function we increment that variable with loop_count++.
At every run interval our ULP program will increment that variable and go back to sleep until the next run interval. But how do we run our ULP or access the shared variable? First, we need to set up our project to build our ULP app.
Enable the ULP in menuconfig
Shortly we’ll compile this new ULP application, but first we need to enable use of the ULP coprocessor in our application. You can do this in one of two ways. In this project, we use the sdkconfig.defaults file to enable the ULP. In that file we add the following entries:
1
2
3
4
CONFIG_ULP_COPROC_ENABLED=y
# CONFIG_ULP_COPROC_TYPE_FSM is not set
CONFIG_ULP_COPROC_TYPE_RISCV=y
CONFIG_ULP_COPROC_RESERVE_MEM=4096
We’re enabling the ULP co-processor, specifying that we want to use the RISC-V co-processor (instead of the FSM one), and we’re reserving 4096 bytes of RTC SLOW RAM for our ULP program. You can set this value up to 8K.
If you don’t wish to use sdkconfig.defaults you can always set these values manually using menuconfig.
Tell the Build System About Your ULP App
Now that we’ve written a ULP program we need to run it. But before we can run it we need to compile and link it which creates valid RISC-V co-processor instructions. Fortunately, this is very straightforward but requires a bit of boilerplate code.
First, modify main/CMakeLists.txt to look like this:
1
2
3
4
5
6
7
8
9
10
11
12
13
14
15
16
17
18
19
20
21
22
23
24
25
26
idf_component_register(SRCS "main.cpp"
                    INCLUDE_DIRS ""
                    REQUIRES soc ulp)

#
# ULP support additions to component CMakeLists.txt.
#
# 1. The ULP app name must be unique (if multiple components use ULP).
set(ulp_app_name ulp_${COMPONENT_NAME})
#
# 2. Specify all C and Assembly source files.
#    Files should be placed into a separate directory (in this case, ulp/),
#    which should not be added to COMPONENT_SRCS.
set(ulp_riscv_sources
    "ulp/main.c"
)

#
# 3. List all the component source files which include automatically
#    generated ULP export file, ${ulp_app_name}.h:
set(ulp_exp_dep_srcs "main.cpp")

#
# 4. Call function to build ULP binary and embed in project using the argument
#    values above.
ulp_embed_binary(${ulp_app_name} "${ulp_riscv_sources}" "${ulp_exp_dep_srcs}")
We’ve made two important changes:
- Adding
soc ulpto theREQUIRESlist for our main component - Calling several CMake helper functions to tell the build system how to build our ULP app
Most of the additions are comments which explain what each line does.
The build system will now generate a binary blob which contains the RISC-V compiled assembly of our ULP application.
You can actually see this code if you run idf.py build. It will be in the build directory and is named ulp_main.bin.S. Let’s look at it.
1
2
3
4
5
6
7
8
9
10
11
12
13
14
15
16
17
18
19
20
21
22
23
24
25
26
/* * Data converted from /workspaces/ulp_playground/build/esp-idf/main/ulp_main/ulp_main.bin
 */
.data
#if !defined (__APPLE__) && !defined (__linux__)
.section .rodata.embedded
#endif

.global ulp_main_bin
ulp_main_bin:

.global _binary_ulp_main_bin_start
_binary_ulp_main_bin_start: /* for objcopy compatibility */
.byte 0x6f, 0x00, 0x40, 0x00, 0x17, 0x11, 0x00, 0x00, 0x13, 0x01, 0xc1, 0xff, 0x19, 0x28, 0x19, 0x20
.byte 0x1d, 0x20, 0x01, 0xa0, 0x83, 0x27, 0xc0, 0x05, 0x01, 0x45, 0x85, 0x07, 0x23, 0x2e, 0xf0, 0x04
.byte 0x82, 0x80, 0xa1, 0x67, 0x93, 0x87, 0x47, 0x10, 0x98, 0x43, 0xb7, 0x06, 0xc0, 0xfd, 0xfd, 0x16
.byte 0x75, 0x8f, 0x98, 0xc3, 0x82, 0x80, 0xa1, 0x67, 0x93, 0x87, 0x47, 0x10, 0x98, 0x43, 0xb7, 0x46
.byte 0xc0, 0xff, 0xfd, 0x16, 0x75, 0x8f, 0xb7, 0xc6, 0x0f, 0x00, 0x55, 0x8f, 0x98, 0xc3, 0x98, 0x43
.byte 0xb7, 0x06, 0x40, 0x02, 0x55, 0x8f, 0x98, 0xc3, 0x01, 0xa0

.global _binary_ulp_main_bin_end
_binary_ulp_main_bin_end: /* for objcopy compatibility */


.global ulp_main_bin_length
ulp_main_bin_length:
.long 90
This is an assembly file for the main Xtensa processor.
Let’s look at the important parts:
.global _binary_ulp_main_bin_start- This creates a symbol for the linker indicating the start of our ULP RISC-V machine code instructions- Lines starting with
.byte- These are the RISC-V machine code instructions representing our main.c ULP program .global _binary_ulp_main_bin_end- Another symbol so the linker knows where our ULP app instructions endulp_main_bin_length- This section indicates how many bytes of RTC SLOW RAM are needed to hold our RISC-V ULP application.
The length in this file is extremely important and will help you know how much RTC SLOW RAM you need to allocate to your ULP program. This will be covered in a future lesson.
Launch the ULP App
Your ULP app must be loaded by the main ESP32 application into RTC SLOW RAM. This happens at runtime in the main application, not at flash time. Once loaded, it can be executed. This requires more boilerplate code.
In whatever main application source file you intend to start your ULP application, add the following code to the top of the file. In our case, that’s just right in main.cpp.
1
2
3
4
5
#include "ulp_main.h"
#include "ulp_riscv.h"

extern const uint8_t ulp_main_bin_start[] asm("_binary_ulp_main_bin_start");
extern const uint8_t ulp_main_bin_end[]   asm("_binary_ulp_main_bin_end");
Remember these symbols from the .S file above? This is just fancy C++ code that creates a variable containing the start and end address of our RISC-V instructions in flash memory. Our ULP application is built and stored in main flash. We have to physically load it into RTC SLOW RAM at runtime. To accomplish the load I like to use a helper function.
1
2
3
4
5
6
7
8
9
10
11
12
13
14
15
static void init_ulp_program(void)
{
    // Load the binary into RTC SLOW RAM. This call also has the side affect of
    // zero-initializing our ULP .bss section containing unintialized variables.
    esp_err_t err = ulp_riscv_load_binary(ulp_main_bin_start, (ulp_main_bin_end - ulp_main_bin_start));
    ESP_ERROR_CHECK(err);

    // Set the ULP wakeup period to 2 seconds. Once our ULP application finishes
    // it will be automatically restarted 2 seconds later.
    ulp_set_wakeup_period(0, 2 * 1000 * 1000);

    // Begin execution of our ULP application
    err = ulp_riscv_run();
    ESP_ERROR_CHECK(err);
}
Finally, let’s log the variable from our ULP application. Add the following to the main while loop.
1
ESP_LOGI(TAG, "ULP Loop Count: %d", (int)ulp_loop_count);
Notice we are referring to the variable here as
ulp_loop_counteven though it’s calledloop_countin our ULP app. More on this in the next lesson. For now, just go with it.
All that’s left is to call our init_ulp_program helper function from the main function.
Flash and Monitor
Run idf.py flash monitor to see your new ULP program in action. At this point, all it does is increment a shared variable that can be read from the main application. The main application will print out this shared value every 5 seconds. The output will look like this:
1
2
3
4
5
6
7
I (247) main_task: Started on CPU0
I (287) main_task: Calling app_main()
I (287) main: ESP32-S3 ULP Playground
I (287) main: ULP Loop Count: 0
I (5287) main: ULP Loop Count: 3
I (10287) main: ULP Loop Count: 5
I (15287) main: ULP Loop Count: 8
Congratulations! You have written a simple ULP program which is loaded and launched from your main ESP32 application. At this point you can enhance your main.c and even add additional source files to your ULP application to accomplish your business needs.
The ULP can perform a variety of tasks while the main ESP32 processor is in deep sleep and wake the main CPU only when it’s needed for performing heavier calculations or sending data to the cloud.
From the ULP domain you have access to peripherals like GPIO, I2C, and ADC to interact with external hardware.
Join the community and get the weekly Production ESP32 newsletter. Concise, relevant content about ESP32 development right in your inbox.